
FAQ
Environment and deployment
Where do I configure a proxy when MotorAI runs behind a corporate proxy?
Configure it in Settings → Security. The default is Use system settings (recommended), which follows the proxy configuration of Windows, so most environments do not need any change. Choose Manual settings when MotorAI needs a different proxy from the one Windows uses, or when the system settings do not get you connected.
1. Open Settings
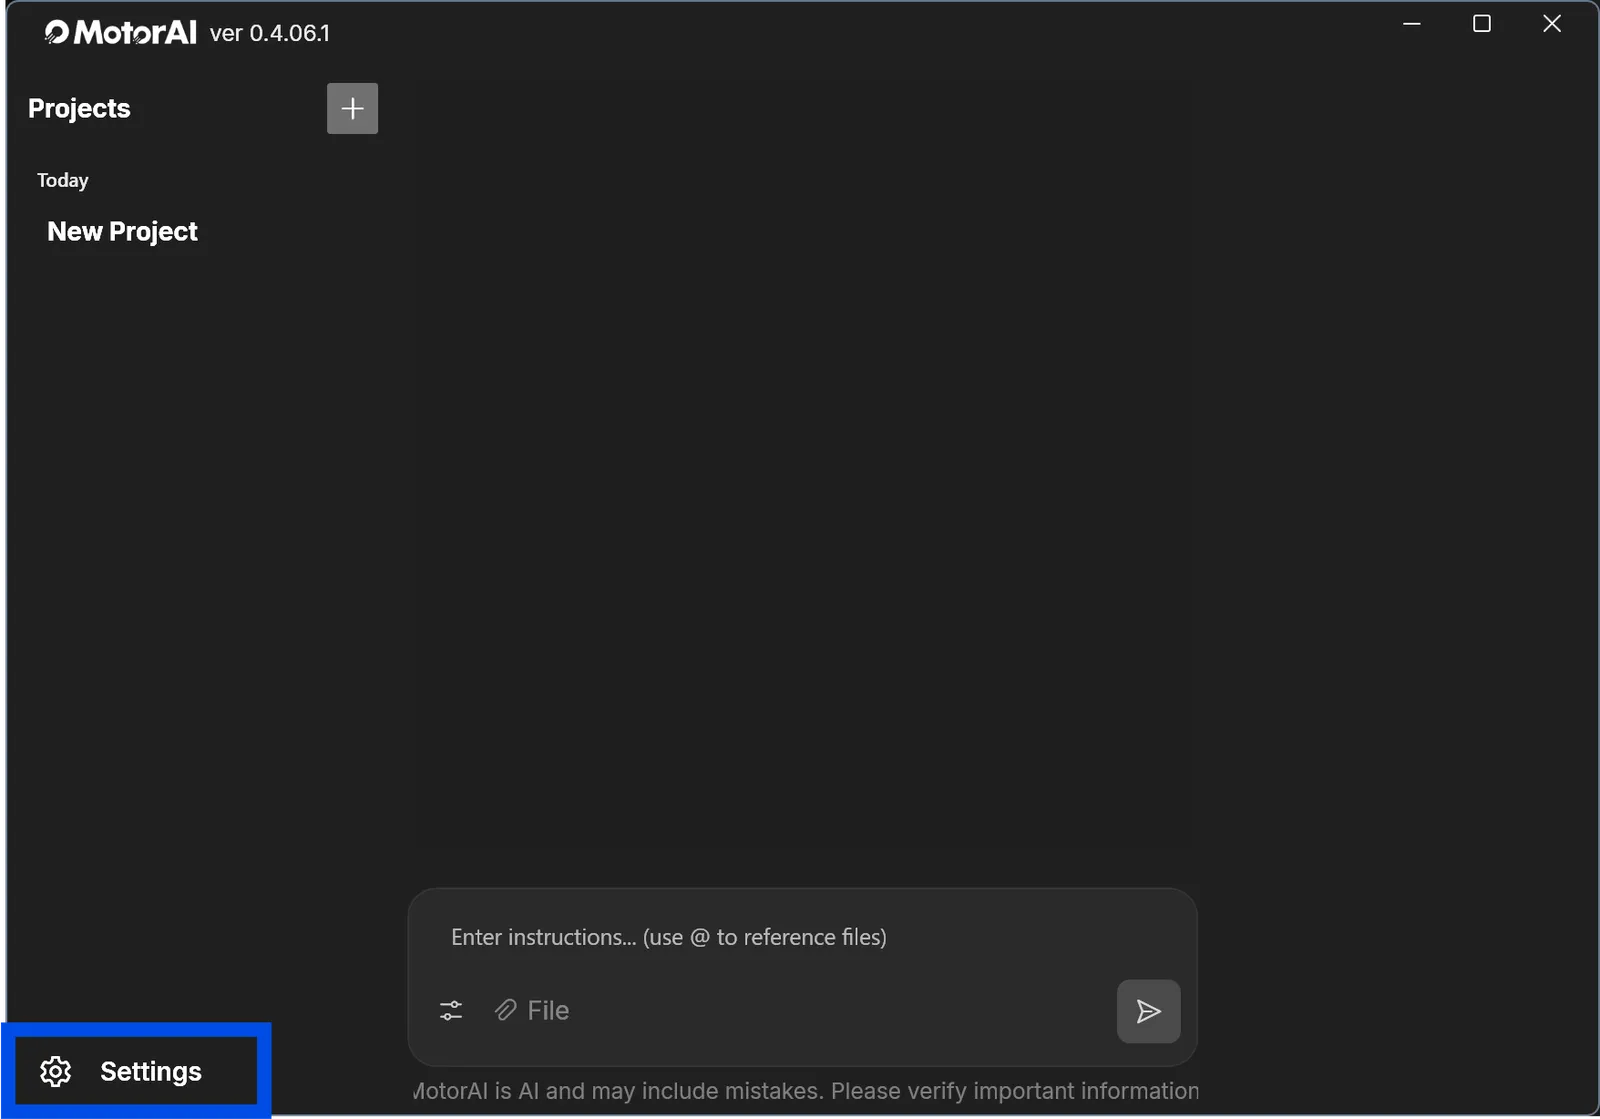
Open the MotorAI main window and click Settings at the bottom left of the window.
2. Enter the proxy under “Security”
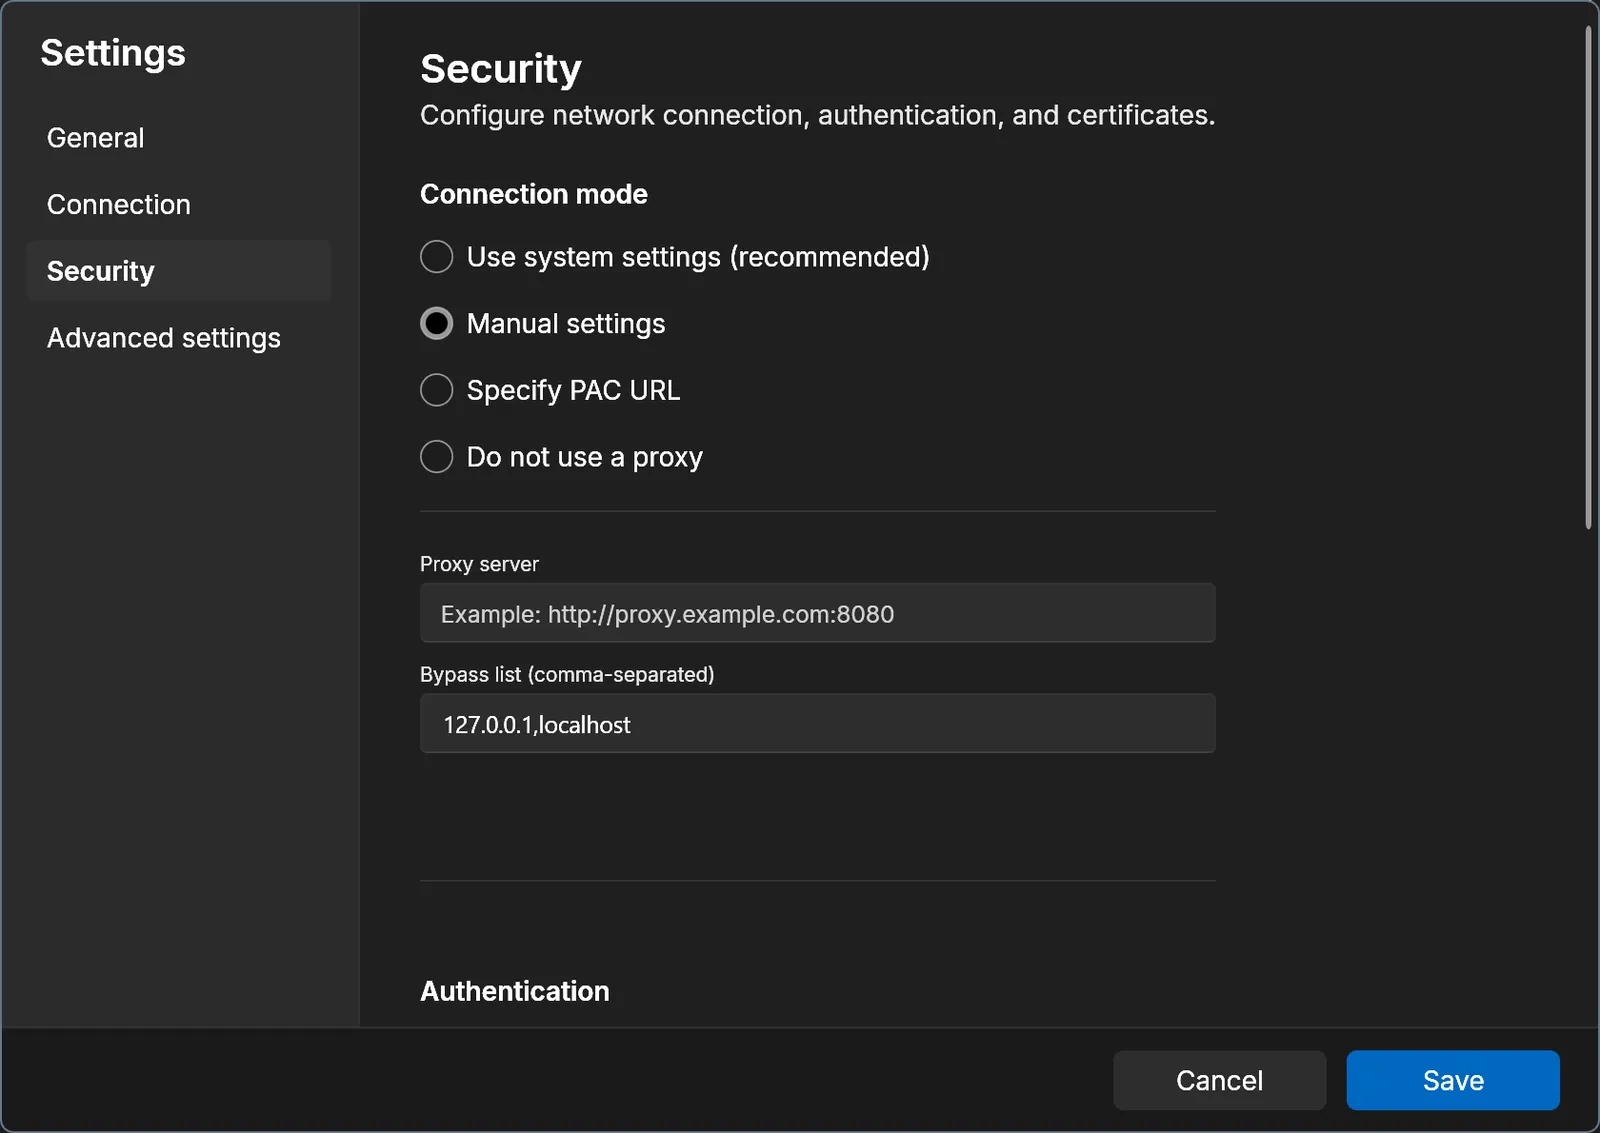
- When the Settings window opens, select Security in the menu on the left.
- Under Connection mode, select Manual settings. The proxy server field below becomes editable once it is selected.
- In Proxy server, enter the address of your corporate proxy in the form
http://proxy.example.com:8080. Include the leadinghttp://and the port number (the:8080part). If you do not know the address or the port number, ask your network administrator. - Leave Bypass list (comma-separated) set to its default value,
127.0.0.1,localhost. If your network has internal servers that must be reached without going through the proxy, add them as a comma-separated list, for example127.0.0.1,localhost,internal.example.com. - Click Save. If you close the window with Cancel, nothing you entered is applied.
Note: Do not remove
127.0.0.1andlocalhostfrom the bypass list. MotorAI communicates with itself locally while it runs, and routing those two through the proxy can make startup or analysis fail.
Which connection mode to choose
- Use system settings (recommended): follows the proxy configuration of Windows. Try this one first.
- Manual settings: specify the proxy address directly. Use it when MotorAI needs a different proxy from the one Windows uses, or when the system settings do not connect.
- Specify PAC URL: enter the URL of the PAC file (automatic configuration script) when your organization distributes one.
- Do not use a proxy: connect directly to the internet without a proxy.
If the proxy requires a user name and password
Scroll down on the same Security screen to Authentication and set the user name and password there.
If it still does not connect after saving
Check the following, in this order.
- The proxy server address includes
http://and the port number. 127.0.0.1,localhostis still in the bypass list.- Restart MotorAI and try again.
- If it still does not connect, your corporate proxy may need to allow the destinations MotorAI communicates with. Check with your network administrator, and contact us if you need help.
Troubleshooting
JMAG-Designer is installed, but MotorAI says it cannot find JMAG (or that JMAG is not installed)
MotorAI could not find where JMAG-Designer is installed. It is normally detected automatically and needs no setup, but when it is not found, setting the Windows environment variable JMAG_DESIGNER_PATH to the JMAG-Designer installation folder lets MotorAI recognize it.
Note: Telling MotorAI the installation path in the chat does not replace this setting. Set the environment variable as described below.
1. Find the JMAG-Designer installation folder
- Right-click the JMAG-Designer shortcut on your desktop or in the Start menu and open Properties.
- On the Shortcut tab, Target shows a path ending in
…\designer.exe. - Everything before
designer.exeis the folder to set. Example: if Target is"D:\JMAG\JMAG-Designer25.1\designer.exe", the folder isD:\JMAG\JMAG-Designer25.1.
Caution: Set the folder that contains
designer.exe, not the location of the shortcut file (.lnk).
2. Set the environment variable
- Type “environment variables” in the Windows search box and open Edit environment variables for your account.
- Under User variables (the upper list), click New….
- Enter the following, click OK, and click OK again to close the window.
- Variable name:
JMAG_DESIGNER_PATH - Variable value: the folder you found in step 1 (for example
D:\JMAG\JMAG-Designer25.1)
- Variable name:
If JMAG_DESIGNER_PATH already exists, select it, click Edit…, and check its value.
3. Restart MotorAI
Quit MotorAI and start it again. Environment variables are read at startup, so the change does not take effect until you restart. After it starts, ask it to do something with JMAG (for example “Start JMAG”) to check that it can operate JMAG-Designer.
If it is still not recognized
Check the following in order.
- The variable name is exactly
JMAG_DESIGNER_PATH. - The folder in the variable value contains
designer.exe(the value does not end in\designer.exeor.lnk). - You fully quit MotorAI before starting it again.
- If it is still not recognized, contact us and include the Target you found in step 1.